Configuring Web Cards
Many devices that Critical Labs communicates with can be configured. Configuration settings range from enabling the SNMP protocol to setting device names, static IPs, and time-servers. Critical Labs supports configuration on a number of different web cards and manufacturers. It also supports saving configurations as templates to be reused across a fleet of devices.
To configure a card, you will need a login username and password for the card with enough privileges to make configuration changes on that card. Critical Labs will not store this username/password after a configuration is complete.
There are two locations where you can access web card configuration:
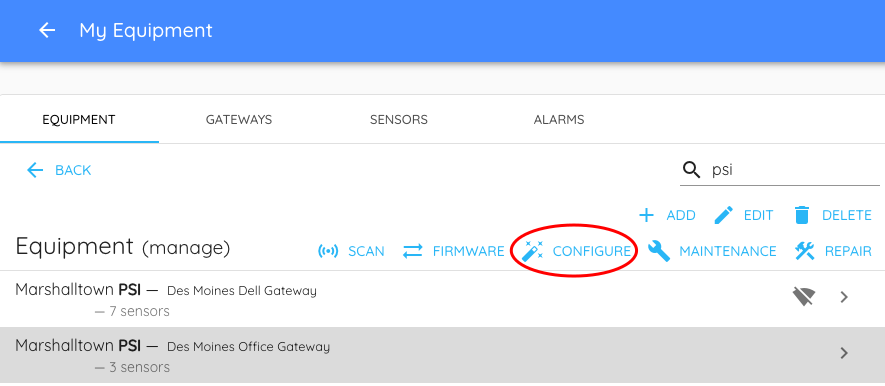
- From the Equipment page, under Manage
- From the Scan page (aka. finding equipment), after performing a scan
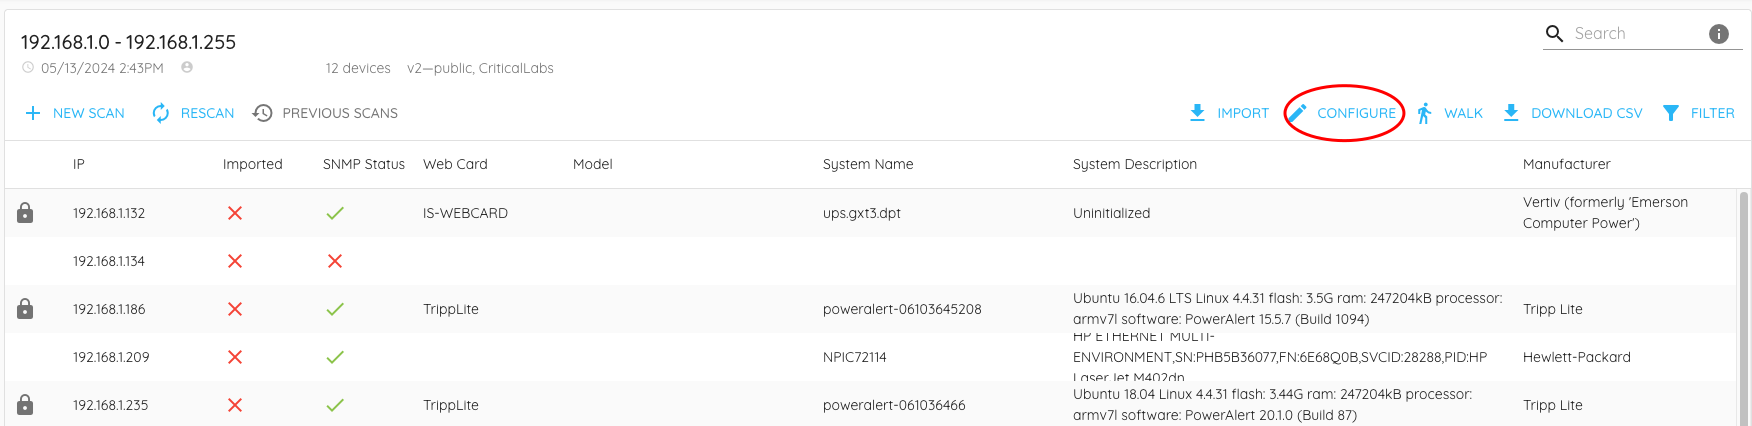
Once you have clicked the Configure button, a popup will appear with different options for configuration. Critical Labs supports three different types of configuration:
- Basic Configuration. This is designed to set up SNMP communication on a card and is supported on a wide variety of device types. This is most commonly used for devices that are unable to communicate with Critical Labs over SNMP. By specifying SNMP credentials using basic configuration and/or setting up SNMP traps, you can tell the card how to communicate with Critical Labs.
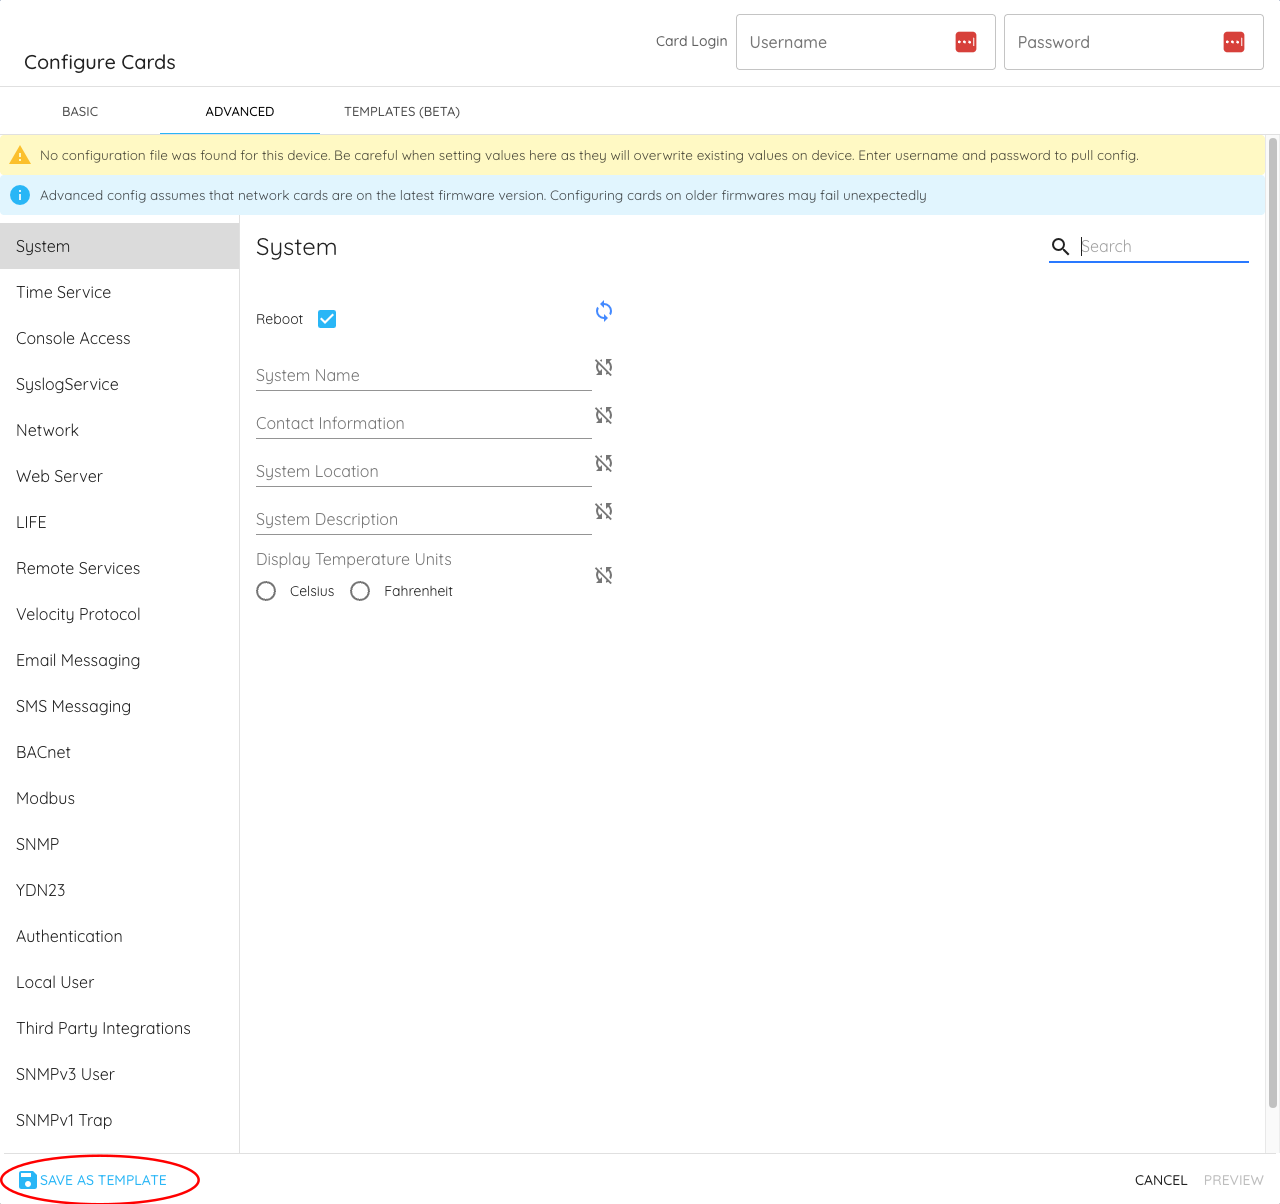
- Advanced Configuration. This is a more comprehensive configuration option. It supports most, if not all, configuration settings for a given web card. Critical Labs supports advanced configuration on Vertiv Unity, RDU101, and RDU120 (coming soon), APC NMC2 or newer, and Geist IMD3 and newer cards. Advanced configurations can also be saved as templates to be used in the future.
- Configuration Templates. Templates are simply saved versions of advanced configurations that can be reused over and over. This is similar to the concept of a "golden configuration file". Configuration templates can also be generated by uploading certain Vertiv or APC configuration files.
Configurations are supported for multiple devices. Critical Labs will provide a handful of status messages to the screen as configurations are taking place.
If a configuration fails
Verify the following:
- You have the correct username/password for the card
- The device is still connected to the network
Once configured, certain web card models will reboot themselves. This is expected and will not drop the power load on a UPS. This restart process can take up to 10 minutes. If you try to scan for the IP address of a web card that is rebooting, the device will not show up in the list. You may need to wait several minutes and try scanning again a few times before the device shows up in the list again.
If a restarted device shows up in a scan list without its full information, it may be in the final stages of rebooting. Please wait a minute and try again to get all the information from the device.
Configuration Templates
Permalink to “Configuration Templates”Note that configuration templates are currently considered in beta. Final features may differ slightly than the options currently presented. Please feel free to reach out to support to provide feedback or report issues.
Critical Labs now supports templating configurations for use in future configurations. This saves the hassle of having to build out configuration settings every time you want to configure a set of devices. Configuration templates are based on the web card type and can be used on devices that match the web card type of the original configuration.
Building a Configuration Template
Permalink to “Building a Configuration Template”There are currently two ways to build a configuration template:
- Build an advanced configuration and then save it as a template
- Upload a supported golden configuration file with your desired configuration
To build a configuration from an advanced configuration, simply click the Save as Template button at the bottom of the screen when you have set up your configuration. This will allow you to name the configuration and to save it.
To upload a configuration file, click on the Templates tab in the configuration screen. This will give you a list of configurations that you have already built and saved. Click on the Upload File button and upload your golden configuration file.
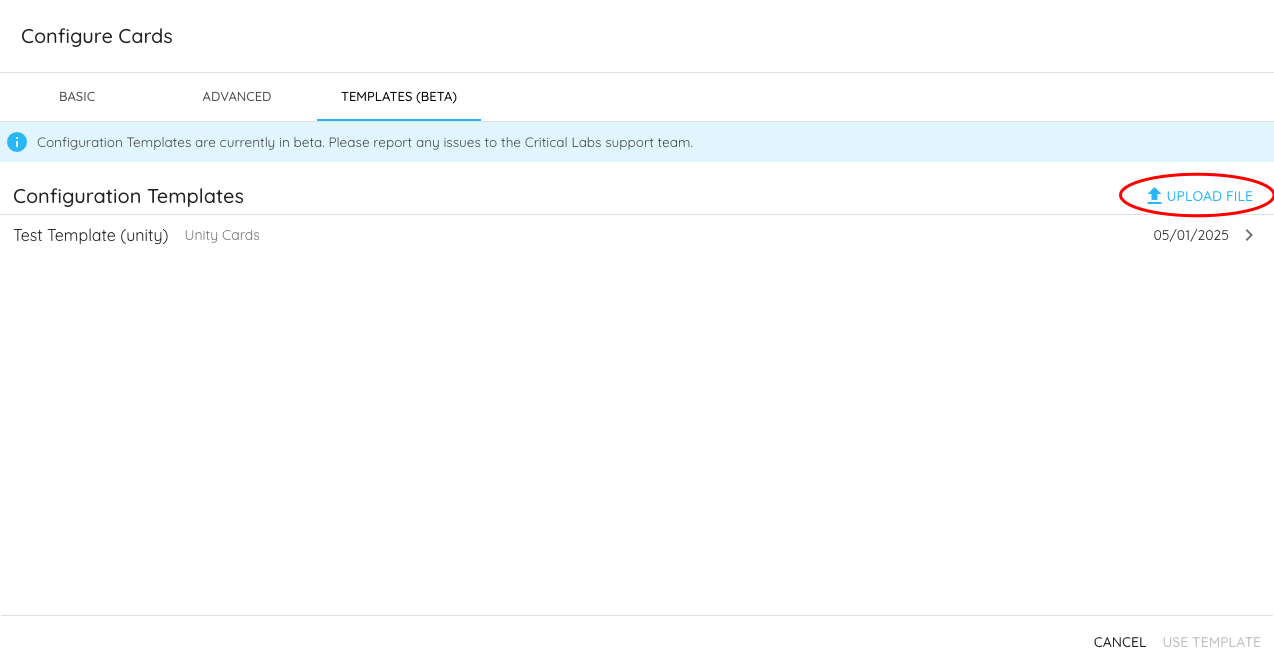
If the upload file button shows that there was an error, then it's possible your golden configuration file is not currently supported. You can still build an advanced configuration and save it on the Advanced tab, or you can contact support to help you with your configuration upload
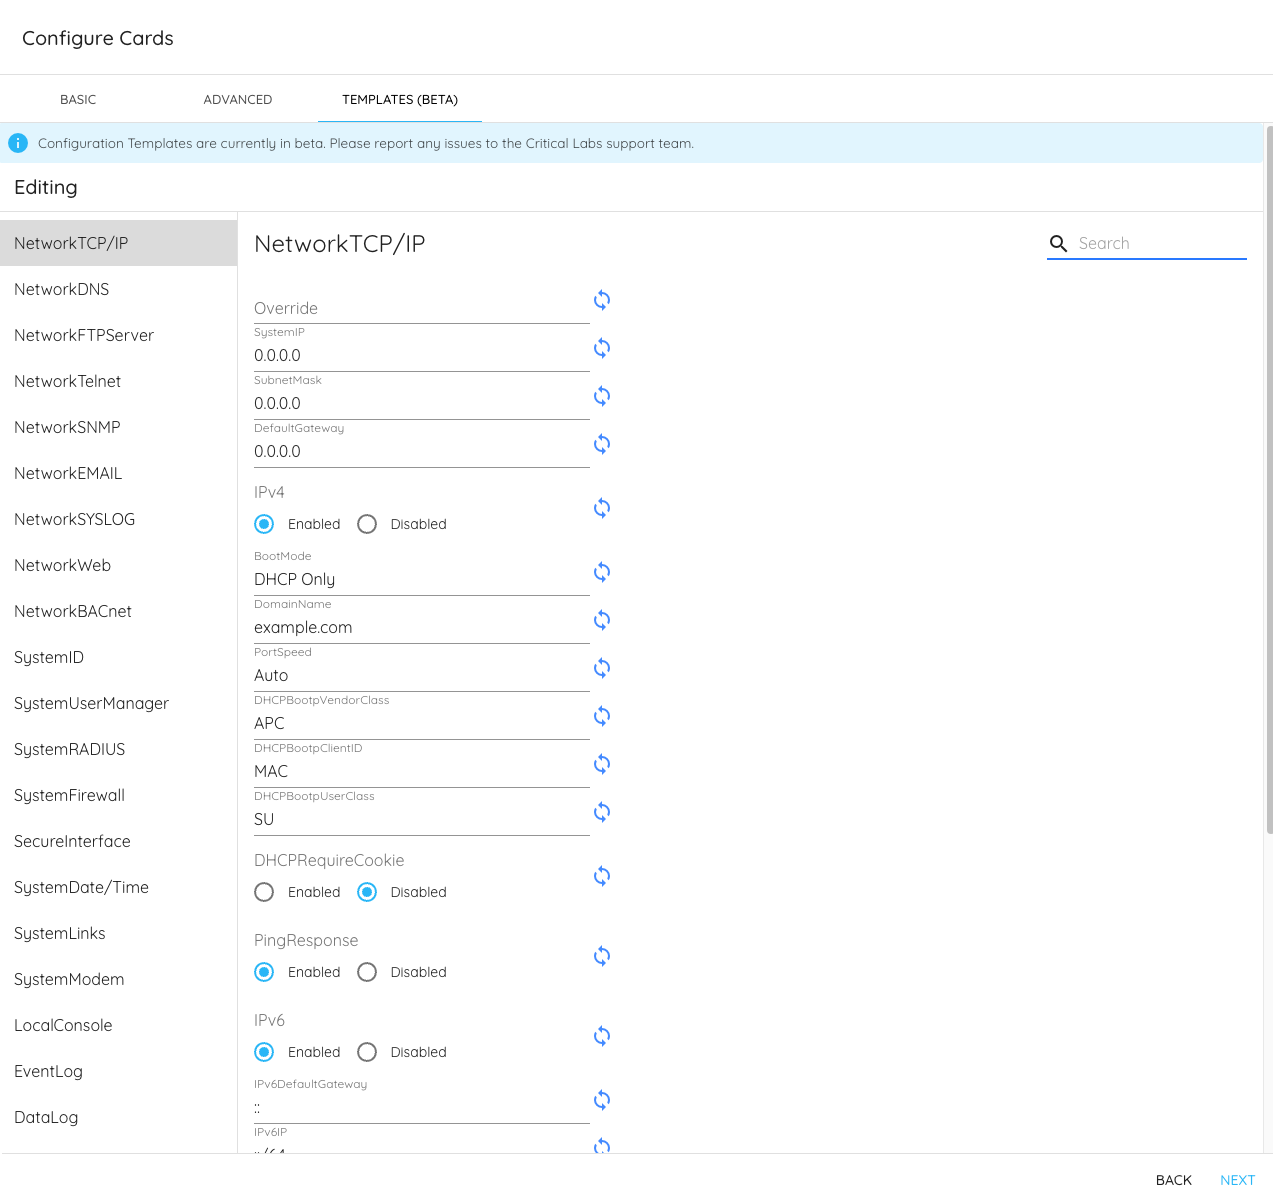
Once your file has uploaded, a form will display allowing you to tweak configuration details. Click Next.
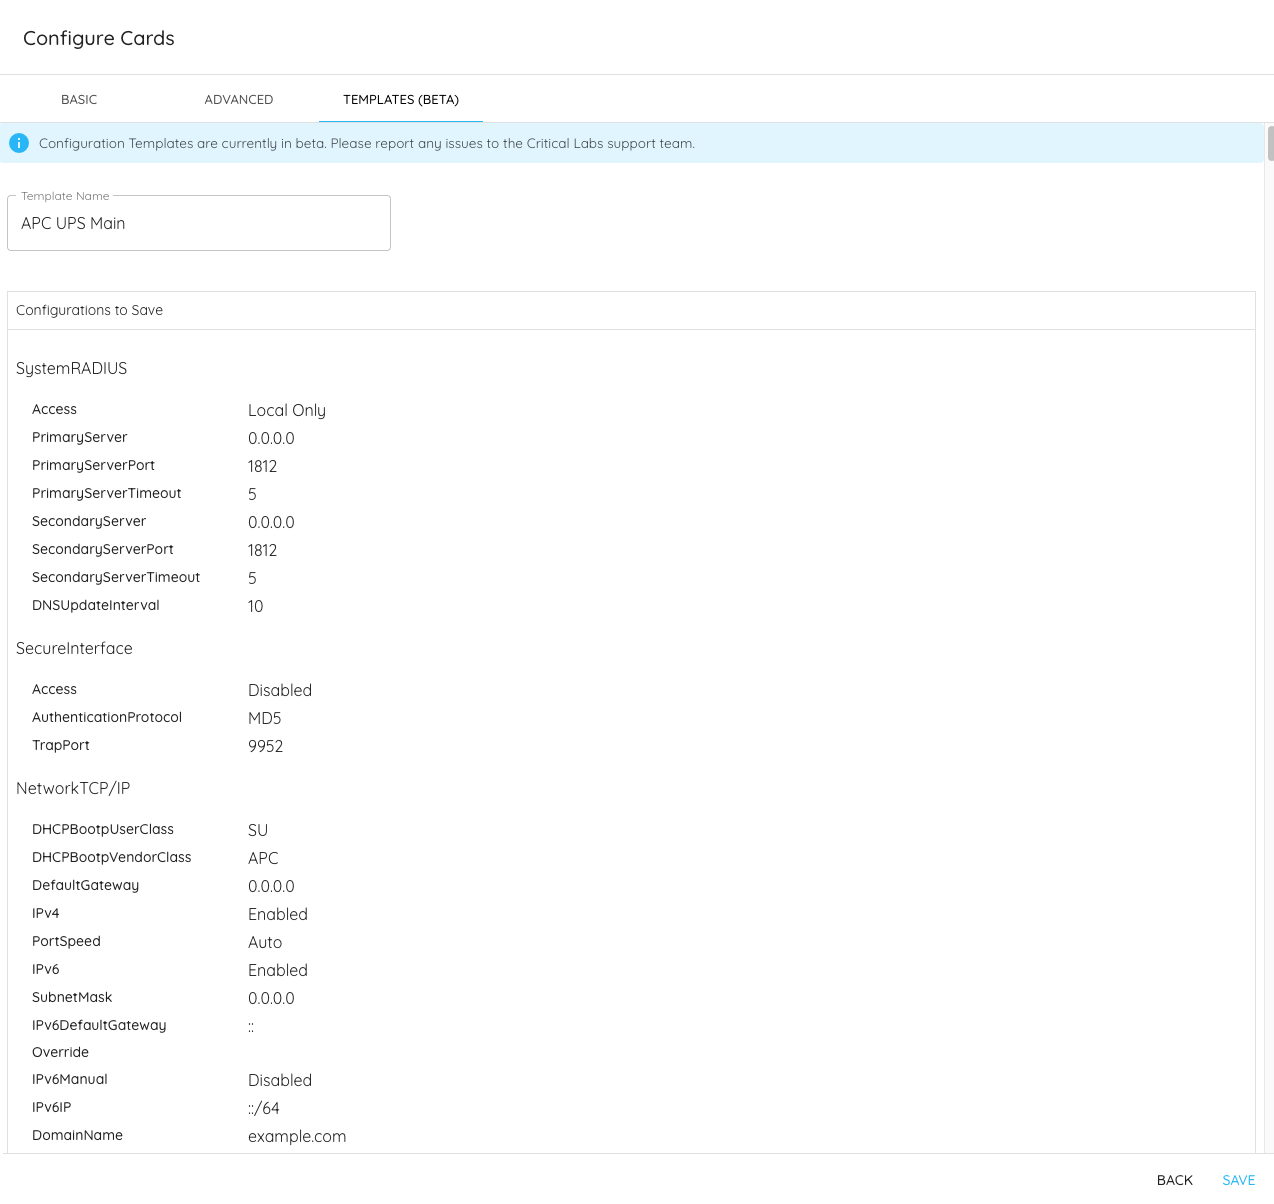
Name your template and click Save.
Using a Configuration Template
Permalink to “Using a Configuration Template”To use configuration templates, follow the standard workflow for device configuration. Select which devices you would like to configure, either from the Equipment page or the Scan page, and select the Configure button. The availability of configuration templates will depend on which devices are selected. Configuration templates will match the web card of the device(s) being configured.
Click on the Templates tab on the configuration page.
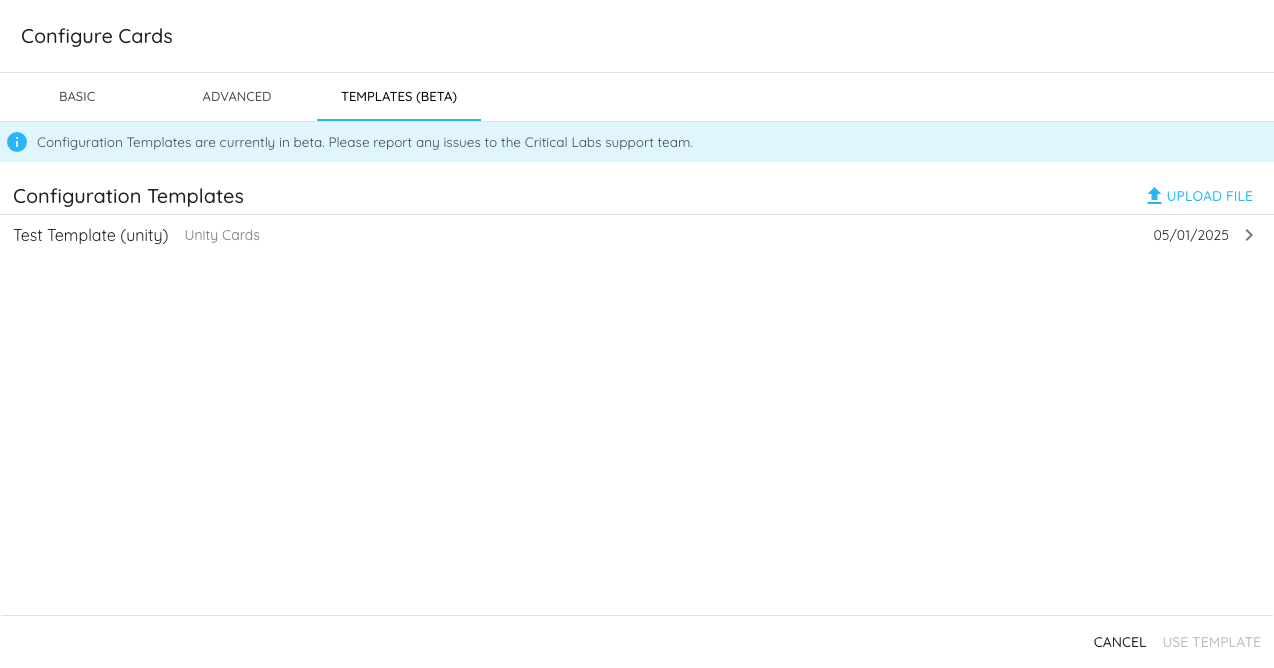
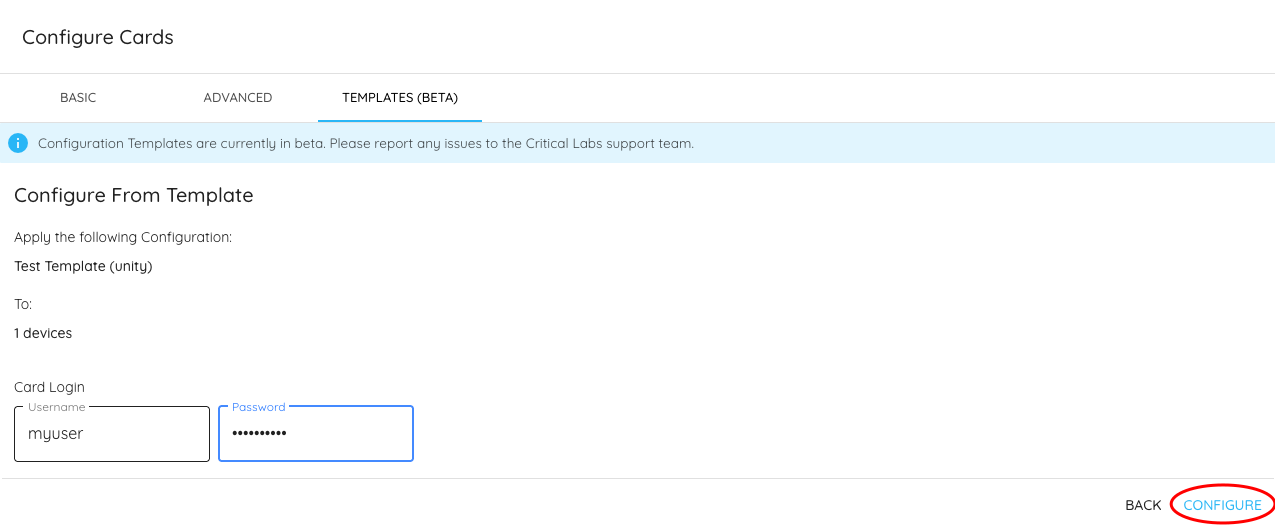
Select the template you would like to use to configure your devices. Click Use Template.

Enter the login credentials for the card(s) being configured. Click Configure.