Finding Equipment
The first step to monitoring and managing equipment in Critical Labs is to find and import it. The Find Equipment page has recently undergone an extensive upgrade and has new layout (in beta). This documentation covers the new layout.
The Find Equipment page uses a gateway virtual machine (VM) or appliance to look for compatible devices on your network. If you have not installed a hardware or VM gateway, then you must do this before attempting to find equipment.
Getting to the Find Equipment Page
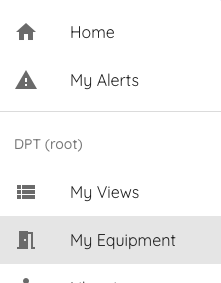
Permalink to “Getting to the Find Equipment Page”Go to the My Equipment page from the top right menu.
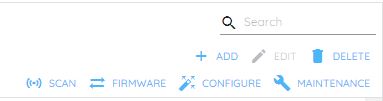
Click the Manage button on the top menu of the equipment list. Click on the Scan button. This will take you to the old layout.
On the top righthand of the old layout page, click on the New Layout (beta) button. This will take you to the new layout.
Scanning for Equipment
Permalink to “Scanning for Equipment”Critical Labs can scan portions of your network for devices that it can recognize and communicate with. In order to do this, you must start a New Scan.

This will bring up a window providing options and settings for your scan.
Network Options
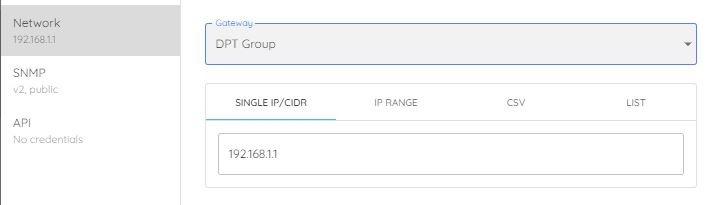
Permalink to “Network Options”Choose a Critical Labs gateway (if you have more than one) and choose the range of IPs you want to scan.
Critical Labs has 4 options for IP ranges:
- Single IP/CIDR - enter a single IP or a CIDR address for a range of subnets
- IP Range - Scan everything between a starting IP and ending IP address
- CSV - Upload a CSV file with the first column being the IP address and the optional second column being the device name. Supports up to 1,000 rows
- IP List - A list of IP addresses, one per line. Supports up to 2,000 IPs
Scan ranges are limited to /22 by default as a security precaution. If you would like to scan a broader range, please contact our support team.
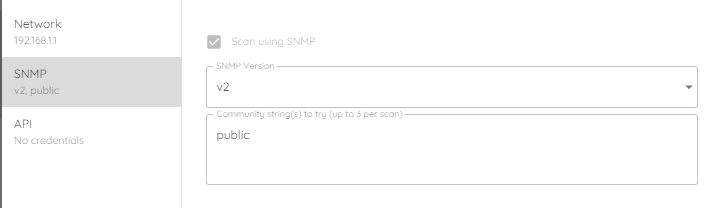
SNMP Options
Permalink to “SNMP Options”The gateway currently always attempts a scan over the SNMP protocol. This may be optional in the future. By default, Critical Labs will scan SNMPv2 using "public" as the community string. This can be updated to match your SNMP credentials.
API Options
Permalink to “API Options”The Critical Labs gateway also attempts to communicate with compatible devices via API, which can give more detailed information about the device. You can ask the gateway to attempt to use default credentials, or you can input your own network card credentials to get better scan results.
Note that Critical Labs does not store card credentials long term. The credentials are used for the scan, and then passwords are scrubbed.
Note that multiple scans using incorrect credentials may cause network cards to temporarily lock. Be mindful of the number of credential scans you perform in a short period of time on the same IP addresses.
After setting up the scan options, click Scan.
This will close the window and will show a live scan results page. If you close out of the window, you can return to the scan by navigating back to the new layout of the Find Equipment page.

As devices are discovered, they will appear in the results table. The data returned for the discovered device depends on how well Critical Labs was able to communicate with the device. It is recommended to run the scan with the correct SNMP and API credentials, as this will provide Critical Labs with more data to assist you during import.
Rescanning Devices
Permalink to “Rescanning Devices”As a convenience option, Single IP/CIDR and IP Range scans can be rescanned by clicking the Rescan button from the top menu. Note that you will need to provide network card API credentials again, even on a rescan, because Critical Labs does not store card passwords long term for security reasons.

CSV lists and IP lists are currently not supported for rescan.
Viewing Previous Scans
Permalink to “Viewing Previous Scans”You may view previous scans performed by any gateway on your account by clicking the Previous Scans button.
By default, this will display a history of all scans performed by your user. To see scans performed by anyone in your account, click the Filter button and select Anyone.

Importing Devices
Permalink to “Importing Devices”Once there is a list of discovered devices, you can now import them using the information gathered during the scan.
To import devices, click the Import button on the top menu.

Select the devices you wish to import.
Note that not all devices will be available for import, specifically devices that have already been imported and devices with cards that do not have a user setup.
Click the Done button.
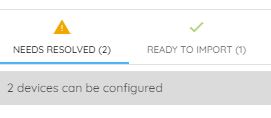
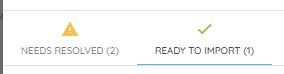
This will bring up a window that will show you the state of the devices you have chosen to import. You will see a list of your devices, separated by their readiness to import. All of your devices might be ready to import right away, or some or most of your devices might need to be "prepped" for import, meaning that they are unresolved. The following sections cover the different types of preparation that may be needed to resolve your devices for import.
Preparing Devices for Import
Permalink to “Preparing Devices for Import”Configuring Devices
Oftentimes, devices are not able to communicate with a monitoring system without some configuration. Some devices don't have the SNMP protocol setup, and many devices require a security whitelist configuration before they will communicate.
If Critical Labs detects this is the case with at least one of your discovered devices, then you will see a list of devices that need configured before they can be successfully imported.
In order to configure these devices, you must input the network card credentials for the device(s) you want to configure. These passwords are not stored long term and are used by the Critical Labs gateway to set up the device(s) to communicate over SNMP.
Select the device(s) you wish to configure, input the appropriate card username and password, and select your preferred SNMP protocol options.
Critical Labs will then attempt to configure the devices. A successful configuration will automatically move the device to the Ready to Import list. Unsuccessful configurations may need to be troubleshooted or retried.
Selecting Device Libraries
Occasionally, Critical Labs will detect a device that it does not recognize. Usually this means device that is capable of speaking SNMP but is not typically monitored by us. In a case where the type of device is manually recognizable, but Critical Labs does not recognize it automatically, there is an option to manually select a library to match to the device.
A library is a set of protocol connection information that includes sensor mappings for a device. It is important that the correct library is set up for each device, otherwise there will be no sensor data.
It is advised to use caution here, as it may not be obvious which library to match to which device. It is often better to consult the Critical Labs support team for assistance than to guess which library matches an unknown device.
If you do choose to manually select a library yourself, you can search through the available libraries and select one for each device. Note that there is a convenient Apply To All button that applies the same library to all devices in the list with one button click.
Unresolved Devices
There is a rare case where Critical Labs may discover something that it is unsure how to communicate with. If you encounter this situation, it is best to try and reach out to support to help troubleshoot.
Importing Ready to Import Devices
Permalink to “Importing Ready to Import Devices”Once your devices have been configured or matched to a library, a new Ready to Import screen will be available. This will show a list of all devices that will be imported, along with the gateway they will be attached to and the SNMP communication settings. Most often, the default settings in this table are correct and do not need to be modified. However, you may modify the device name, its attached gateway, and SNMP information if desired.
Once finished with this page, click Next.
Adding Dashboards to Imported Devices
Permalink to “Adding Dashboards to Imported Devices”By default, Critical Labs will attempt to create a pre-formatted dashboard for each device that will be imported. Almost all Critical Labs libraries have at least one corresponding view template that will be used to automatically create the dashboard(s). In some cases, there may be more than one available view template or no template to assign to a given library. These cases will show up red in the Setup Dashboards page.

If there is more than one template available, usually in the case when you have built a custom view template, you must select which template you want Critical Labs to use to build your dashboards. You can do this by selecting the appropriate device and selecting a template from the Dashboard Template menu. For devices of the same type, there is a convenient Apply All button.

If there is no view template available, the simplest course of action at this point is to skip creating a dashboard during import. You can do this by selecting the offending device and toggling Create Dashboard to off.

Tagging dashboards
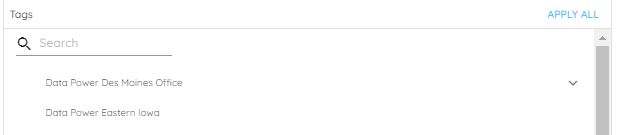
If you plan to organize your dashboards by tags, it is recommended to select which tags you want to associate with your dashboard(s) using this screen. You can assign tags by clicking the appropriate device and selecting which tags you would like to assign. An Apply All convenience button is available to apply the same tags across all new dashboards.
Dashboard Alerts and Permissions
It is also possible to set the permissions and alerts for each dashboard that is created. These options are available by clicking the Alerts/Permissions button on the top right of the Setup Dashboards page.
Once you are happy with the dashboard setup, click Import to start importing devices.
Configuring Devices
Permalink to “Configuring Devices”There is an option to fully configure devices that are supported by Critical Labs. This can be done from the Configure button in the top menu. Only supported devices will be able to be selected. See Configuring Web Cards for more information.
SNMP Walking Devices
Permalink to “SNMP Walking Devices”SNMP walks are an advanced feature of Critical Labs that allows for advanced troubleshooting and creation of new device libraries. To run an SNMP walk on a device, click on the Walk button and select the device you would like to walk. This will take you to the SNMP walk page. For more information, see this section on SNMP Walks.