Building Custom Libraries
From an SNMP Walk
Permalink to “From an SNMP Walk”If you are able to discover a device using Critical Labs, and it does not match to a global library, you can attempt to perform an SNMP walk on the device to create a custom library. This is done by selecting the unmatched device in the list and clicking the Walk Equipment/Create Library button.
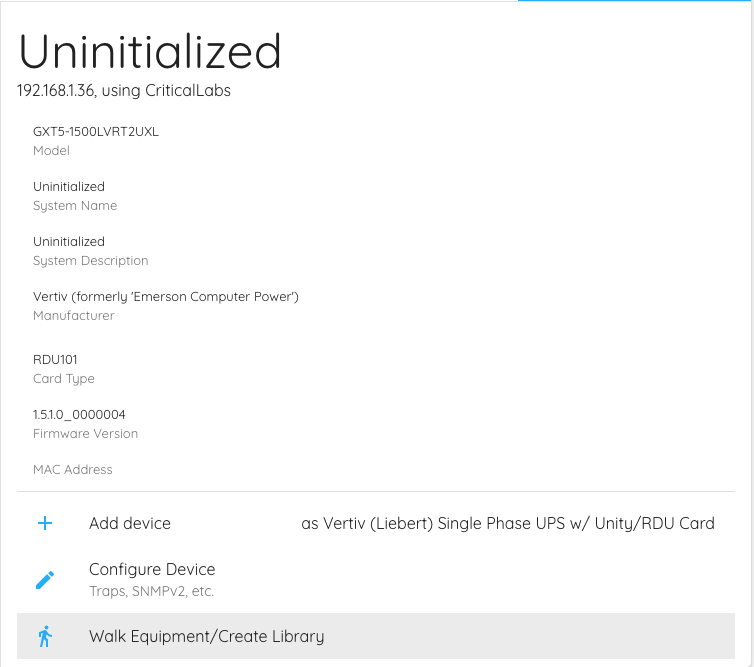
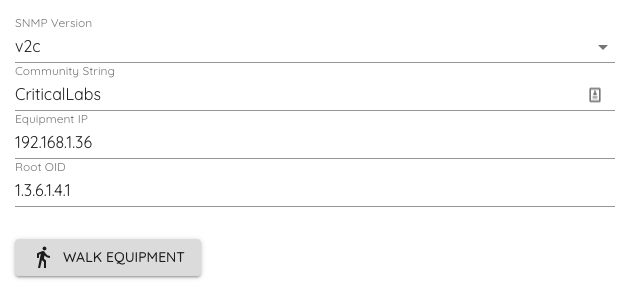
This will take you to the SNMP walk page. Critical Labs will automatically populate the IP address of the device, along with the community string and a default root OID. Click Walk Equipment to begin the SNMP Walk.
What is an SNMP Walk?
An SNMP walk is synonymous to reading a map. The device being walked will provide a full list of addresses to the data that it stores along with the data that is currently being stored.
Unfortunately, the addresses that the device returns are meant to be read by machines and not humans. They are called Object Identifiers, or OIDs for short. They look something like this:
Address: 1.3.6.1.2.1.1.1.0 Data: My UPS
The only way to unlock this address to give us something more readable is to provide a Management Information Base (MIB) file that translates the address into something useful, such as:
Address: System Description Data: My UPS
The gateway will now perform the walk on the device and will report back the data that the device responds with. This may take several minutes.
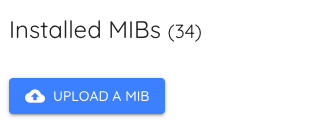
If the data that returns looks like gibberish and is difficult to read, it is likely that you will need to upload a MIB file to translate the walk correctly. In this case, you will need to reach out to the manufacturer of the device to retrieve the MIB file. Sometimes manufacturers will have MIBs available on their website for download. Once you have retrieved the MIB file, you can upload it on the SNMP Walk page by clicking the Upload a MIB button.
Once the MIB has been uploaded, you must perform the walk again by clicking Walk Equipment a second time and wait for the results to come back.
After you have retrieved a successfully translated walk, you can save time by clicking the See Previous Walk walk button. This will pull up the last walk that was performed and will be available immediately, instead of having to wait several minutes for a fresh walk.
Once you have a walk that has been translated properly by a MIB file (you should see human-readable strings instead of OIDs), you can now start to build your library. Under the OIDs section of the walk, you can simply select the rows you would like to add to your library.
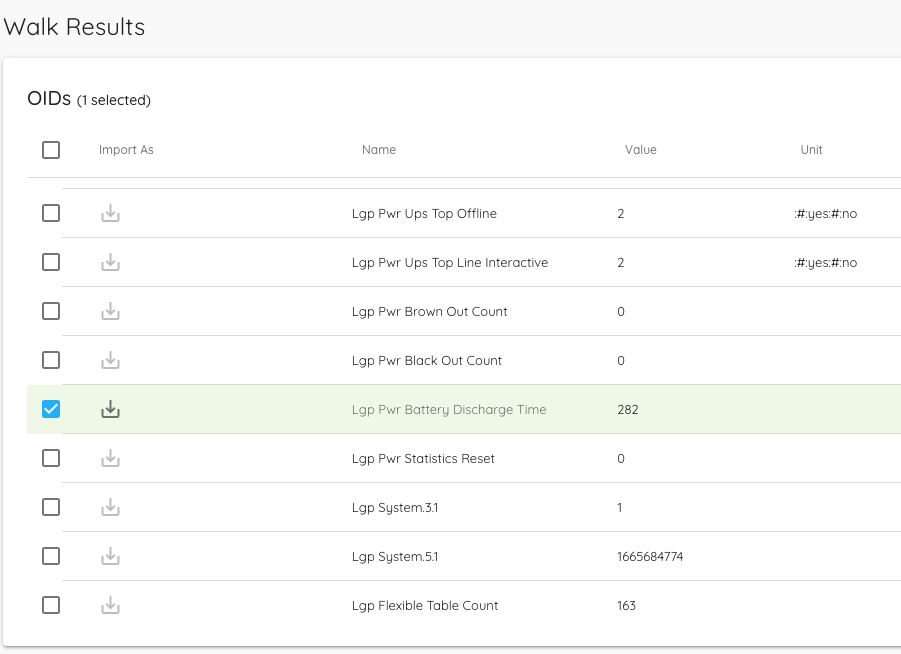
There are three different types of data that Critical Labs stores in a library:
- Numerical Sensor Data (such as Battery Time Remaining)
- State Sensor Data (such as Alarm on/Alarm off)
- Meta/Info Data (such as Device Name or Serial Number)
Each one of these data types needs to be stored in a different way in your library.
Importing Numerical Sensors
Permalink to “Importing Numerical Sensors”The numerical sensor data type is the most straightforward. Numerical sensors can only have values that are numbers. If the data value at this address is anything but a number, the sensor will show up as disconnected in Critical Labs. When you select a point as numerical sensor data, it will show up green:
Importing State Sensors
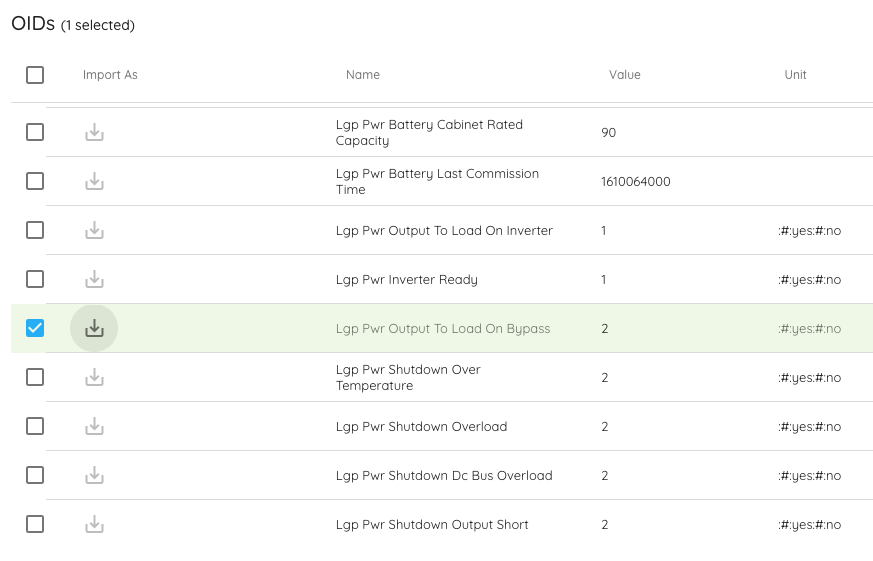
Permalink to “Importing State Sensors”The state sensor data type can read non-numbers, but you must account for all the states that this value can possibly be. To import a sensor as a state sensor, select the row and click on the import icon to the left of the row:
A popup will show, allowing you to import as either As Sensor or As Info.
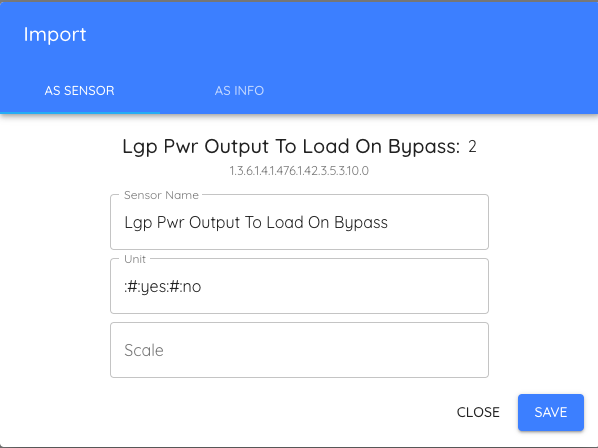
Be sure As Sensor is selected. Rename the sensor, if desired (this is how it will
show up in the library). Under the unit field, list all the states possible for this
device, separated by the :#: delimiter (see
State Sensor Units below). If
you do not know this information, you can reference the manufacturer MIB or run a
test on a live piece of equipment to figure out what states it will return.
Depending on the manufacturer, Critical Labs might populate these states for you.
State Sensor Units
Permalink to “State Sensor Units”If the sensor you are adding is a state sensor, you must use a special shorthand to tell Critical Labs all the possible states that this sensor can have in the unit field. You must provide each state separated by the
:#:delimiter. An example unit for a state sensor might look like:
state0:#:state1:#:state2For Modbus, make sure the state matches exactly the number of the state in the documentation. In the above example, a value of 0 will translate to "state0", a value of 2 will translate to "state2". You can use blank states to get to the number you need to get to. For example:
:#:state1:#:state2:#::#:state4:#::#::#::#:state8Note that order of states is important. Under the hood, Critical Labs converts these states to a number when reading data from the device based on the order of the states in the library. This number is then used to determine alarms and historical trends on dashboards. Changing the order of these states after devices and sensors have been added and are reporting can have unintended side effects.
The :#: delimiter in the unit field will tell Critical Labs that this is a
state sensor instead of a numerical sensor. It will still show up green on the import
row.
Importing Info Data
Permalink to “Importing Info Data”Meta, or "Info" data, is considered mostly static and only updates once/day. This is intended for things like a device name, a serial number, location data, device configuration information, and other non-sensor data. This will show up in the Info Widget on a dashboard, and it will be listed under the Info tab on the Equipment Page.
To import data as Meta/Info data, select the row and click the import icon on the left to bring up the import popup.
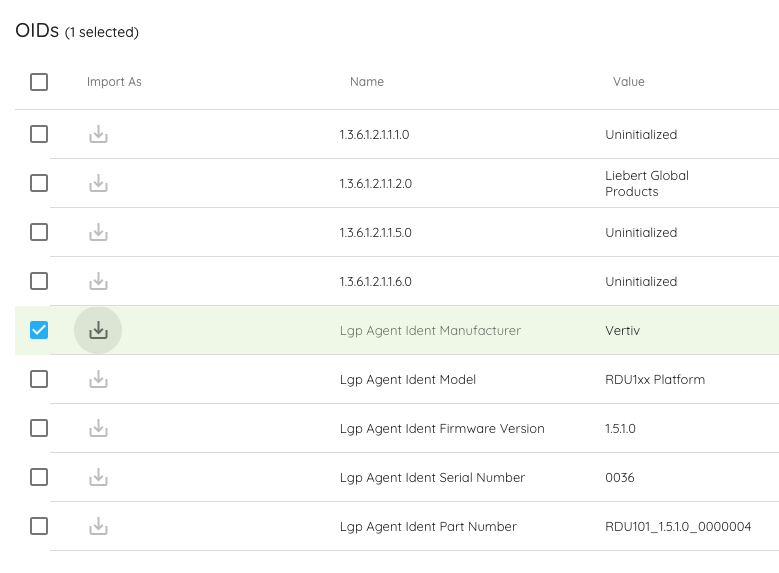
In the popup, make sure As Info is selected. Rename your data point, if desired.
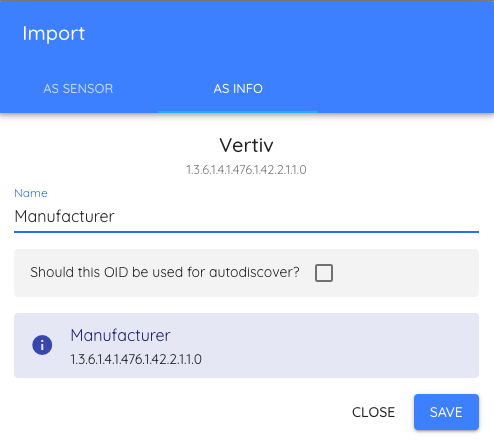
Autodiscover Points
You will also see a checkbox asking if you want this OID to be used for autodiscover. If you select this, then this point will be used as a hook to help match devices to this library when finding equipment.
Often times, more than one OID is needed to help distinguish one device type from another. Take a look at some of the global libraries to see how this has been implemented. Autodiscover points will be below the SNMP OIDs table with a remote icon next to them:
It is recommended that you consult Critical Labs support when attempting to build a library with autodiscover points. This is a very advanced topic that can have unintended consequences if implemented incorrectly (such as devices matching to the wrong library).

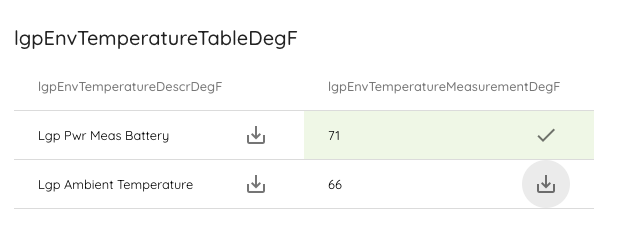
SNMP Tables
Permalink to “SNMP Tables”There may be tables present in your SNMP walk that do not follow the nice row format of the SNMP OIDs table. These tables will not have checkboxes, but you can still import data from them. Simply click the Import button to the right of the data point you wish to import and follow the steps above for setting the correct data type.
Saving the Library
Permalink to “Saving the Library”Once you have all the points selected that you wish to have in your library and you feel confident that you have selected the correct data type, scroll up to the Library Template Info box just below the Walk Equipment button.

Verify that the manufacturer and model of the device are to your liking. If you are planning to reuse this library for several models of equipment, you may rename the model field to something more generic.
Scroll down to the bottom and click Create Library.
From the Library Page
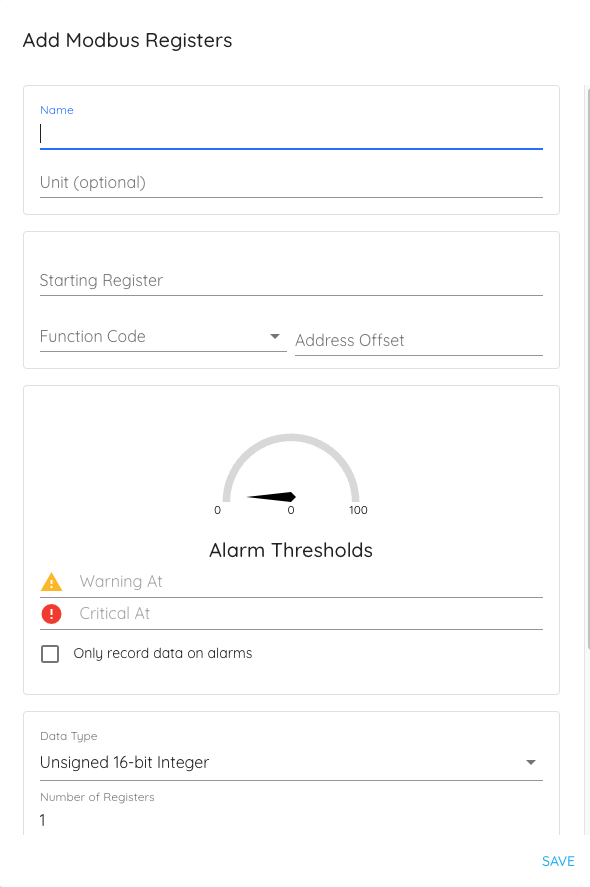
Permalink to “From the Library Page”You can build a custom library directly from the library page. This is the only way to build a Modbus library currently. You will need to know the protocol-specific information, such as a list of OIDs for SNMP or a list of registers for Modbus.
From the libraries page, click the add button to the right of Company Libraries.
Input a manufacturer and a model name (you may use a more generic library name for multiple models). Click Save.

On the library page, click the Add button next to SNMP OIDs or Modbus Registers, depending on which protocol you plan to use. You can set the sensor name, the unit, Modbus or SNMP-specific protocol information, and a default alarm threshold. For state sensors, see State Sensor Units.